Here is what you need:
A Camera that has a manual shooting mode. All SLR cameras have manual mode and many digicams do as well. If you don't know how to set the manual settings then you need to set down and read your camera manual on how set the settings...... Usually there is a knob on the camera with settings like M, Av, P and/or little icons. M would be manual mode.
Once in manual mode you need to know how to set the f/stop, ISO and shutter speed. This is where the little book that came with your camera comes in handy. All cameras have different ways to set these, either via menus or knobs. On my Canon SLR I have a big wheel on the back and a knob on the top to play with. As I don't know what camera you have I can't help you here. To get the most out of your camera you will need to read the user guide and keep it handy for reference. This means a short trip to your attic, basement, closet or dumpster for a little "Where the heck did I put that" session. Or you could download it from the Internet by going to the manufactures website.

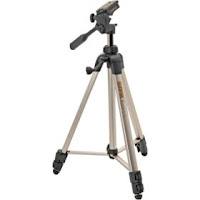
A Tripod. Because you will need to keep the shutter open for several seconds you absolutely need the camera to be mounted on a tripod. Without this support you will end up with images of colorful fuzzy blobs. This can be an artistic statement but that's not what we are aiming for here. In any low light situation the camera needs to keep the shutter open (Exposure time) longer to collect enough light to capture an image. On a sunny day the shutter may only need to stay open for 1,000th of a second, but in low light situations the time needed may be up to several seconds! So unless you're a zen master who can stay so still a bulldozer won't budge you a tripod is the best way to keep the camera steady.
 Remote shutter button. This is optional but highly recommended. This is just a simple device that is a button on the end of a wire that plugs into your camera and allows you to snap the image without touching the camera. Some cameras may not have this option available. Your camera manual will usually list the options available.
Hot Coffee or other caffeine laced liquid. It can get cold out there at night!
So now that you have the equipment ready we are all set to take some lunar eclipse photos.
1) Set up you camera on the tripod and plug in the remote shutter button.
2) Set ISO to 100 or 200 - What ISO denotes is how sensitive the image sensor is to the amount of light. The higher the ISO, the more sensitive the image sensor and therefore allows the possibility of shooting in low-light situations at faster shutter speeds. The lower the ISO the cleaner the images will look. You could hand hold the camera set at a high ISO because it requires less exposure time but the images will look grainy. I like the clean crisp look shooting at low ISO.
3) Frame the moon in your viewfinder. Use your best telephoto lens or the optical zoom on your digicam. Do not allow the digicam to go into digital zoom mode as digital zoom is not really zoom. What digital zoom does is enlarge a portion of the image, thus 'simulating' optical zoom. In other words, the camera crops a portion of the image and then enlarges it back to size. In so doing, you lose lots image quality.
4) Set the f/stop (Aperture) to 5.6 or 8.0. This is the "sweet spot" for most lenses where you get the sharpest, cleanest images.
5) Set the Shutter Speed (Exposure time) to 1/30th of a second if the moon is bright or to 1 second if the moon is in eclipse.
6) Focus! Try auto focus first. If auto focus can't grab the shot because the light is too low then you will need to manually focus. This can be difficult due to the low light at full eclipse but you can get really close. You may want to experiment and take several shots at slightly different focus settings.
7) Snap off a shot and look at the result (the great thing about digital cameras), if it's too dark then change the shutter speed 2 setting slower, say from 1 second to 3 seconds. Adjust the shutter speed the other way if the moon is too bright. Experiment until the image looks good. I also like to bracket shots around the initial setting doing one at 1 stop lower and 1 stop higher. For example 1/2 second - 1 second - 2 seconds, just to be sure. You will need to keep adjusting as the moon gets dimmer the brighter as the eclipse progresses.
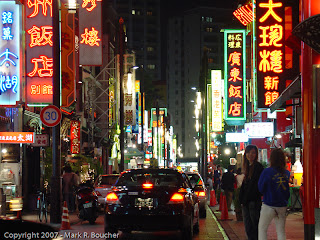
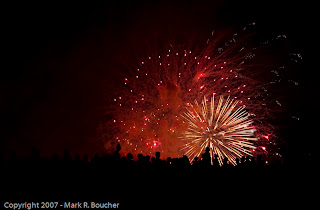
With some practice you will master your camera settings and be able to use these tips in all sorts of low light settings. City lights, Christmas lights and Fireworks all use these basic principals so experiment and have fun! I would love to see your work as well so go ahead and put some images in your comments.


In future posts I'll go into more detail about ISO, Shutter Speed and f/stop. So come on back now y'hear!


